
The opt-in form lets your visitors subscribe to your Blog/website. Opt-In forms play a crucial role in your Internet Business. With your blog subscribers, you can do a lot of things. you can share your latest blog posts, you can tell about updates on your product and a lot more things. We believe Opt-In forms play a crucial for every Internet Market. So especially for them, we have added Opt-In form support in AMP.
You can get Opt-In Support in AMP from here >Opt-in in AMP
Let’s get started to know, How to Create Opt-In form in AMP
How to Create Opt-In form in AMP
After Installing & Activating AMP Opt-in Forms plugin extension.
Follow the simple Steps:
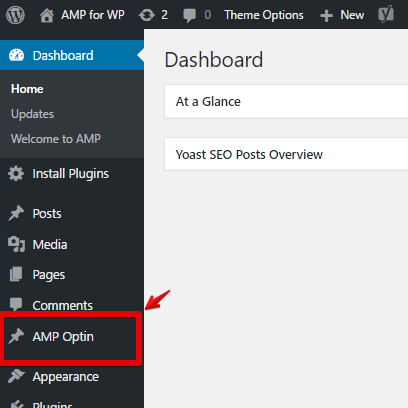
Step 1: First go to WordPress Dashboard -> AMP Optin Section, as shown in the below image.
Step 2: First of all, Click on Add New Optin as shown below.

Step 3: To Create an Opt-In form, follow the below steps.

In first filed you need to enter the title, it can be anything of your choice.
- Company: In this option, you need to select the company. for example, I am using MailChimp company from the Drop-Down menu and enter API URL.
- Title: You can Add the title to your Opt-In Form. It can be anything of your choice. This Title will be displayed on your Opt-In form.
- Description: The Description is nothing but the description of your Opt-In form. It can be anything of your choice.
- Visual Editor: Once you check this option Visual Editor box will appear.
- Redirection: Once you check redirect URL option will appear which URL you want to redirect you can enter in this option.
- Fullname: In this field, you need to enter the Fullname of the User.
- Add ZIP Field: In this field, you need to enter the ZIP Field Name.
- Phone: In this field, you need to enter the phone Label, phone ID, Phone Value / Name of the User.
- Product: In this field, you need to enter the Product.
- OrderID: In this field, you need to enter the OrderID of the User.
- GDPR: In this field, you need to enter the GDPR of the User.
- DateofPurchase: In this field, you need to enter the DateofPurchase of the User
- COUNTRY: In this field, you need to enter the Country details of the User.
- Email Address: In this field, you need to enter an email address even if you give a name, it will be considered as Email only.
- First Name: In this field, you need to enter the First name of the User
- Last Name: In this field, you need to enter the Last name of the User
- Submit Button: In this field, you can give submit button name Submit button can be Renameable.
- Success Message: In this field, you can enter a Successful message.
- Shortcode: AMP Opt-In Forms Comes with Shortcode feature, with which you can use the same Opt-In form where ever you want in your AMP website.
Step 4: Click on the “publish” button.
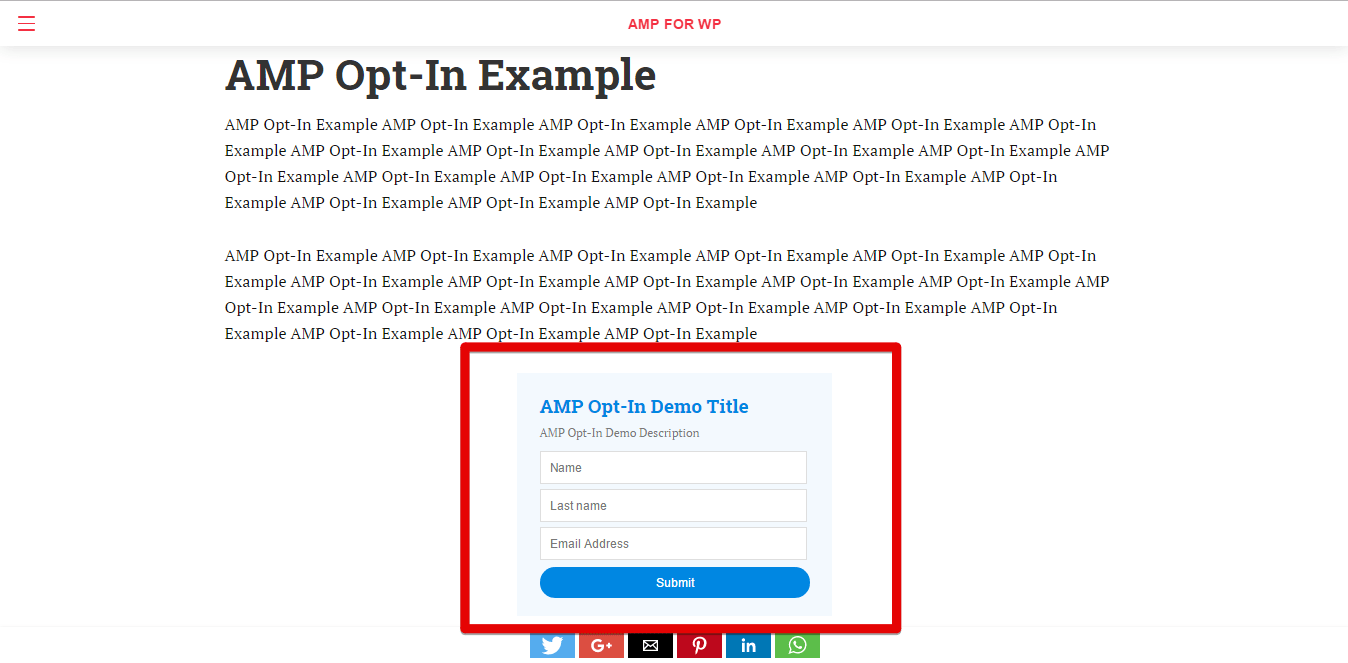
The output of AMP Opt-In Forms.
Make sure you need to fill this form and then click on the submit button after that you will get the “Subscription successful” message.
How to Style your Opt-In Form
To Style your Opt-In form to your desired colors, you follow the below steps.
You can find this option below your optin form. See this image:

From here, you can change the Background Color, Headline Color, Form Text Color, Button Background Color & Button Text Color in your Opt-In form.
How to Position your Opt-In Form
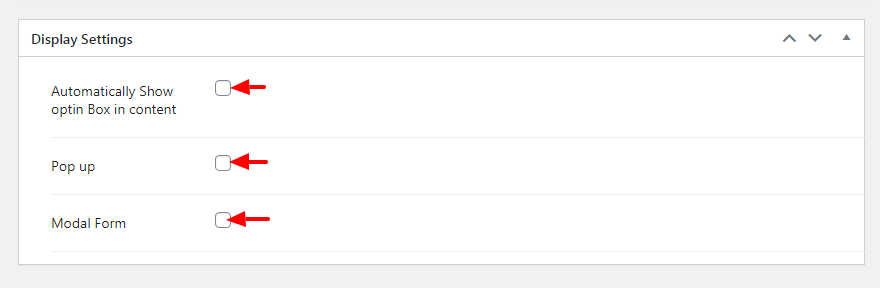
From Position Section in AMP Optin settings, you can control the positioning of your Opt-In form.
You can find this option below your optin form. See this image:
1. Automatically Show optin Box in content:
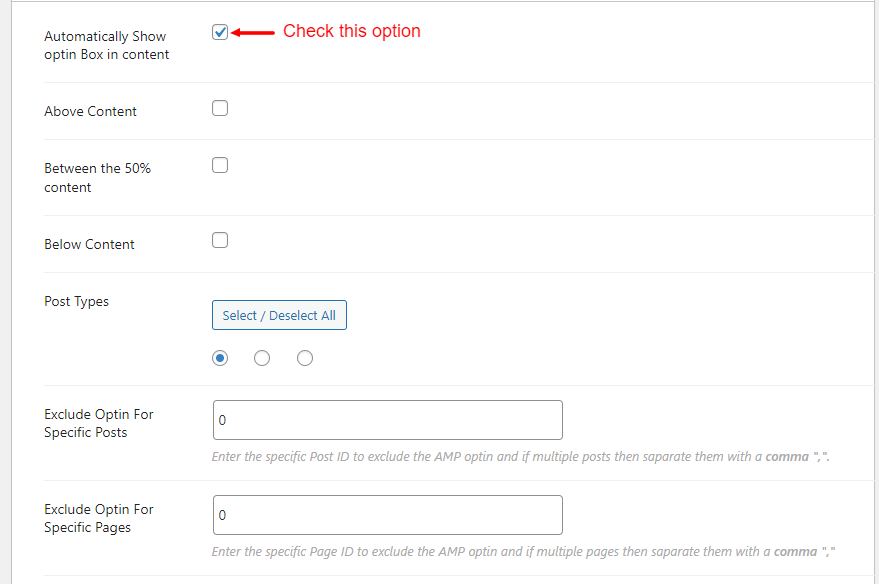
- If you want to show Optin Form Box in Content, First of All, Turn ON ” Automatically Show Optin Form in Content “
- Select an Optin to display from the Drop Down.
- Turning ON Optin Form Above Content, Make your Optin Form Appear above the Content.
- Turning ON Between the 50% Content, Make your Optin Form Appear Between half of your content.
- Turning ON Below Content, Make your Optin Form Appear Below the Content.
- In this option you can select post types.
- Exclude Optin For Specific Posts: In this field, you can enter the specific Post ID to exclude the AMP optin and if multiple posts then separate them with a comma “,”
- Exclude Optin For Specific Pages: In this field, you can Enter the specific Page ID to exclude the AMP optin and if multiple pages then separate them with a comma “,”
The output of Automatically Show optin Box in content for below the Content
Make sure you need to fill this form and then click on the submit button after that you will get the “Subscription successful” message.

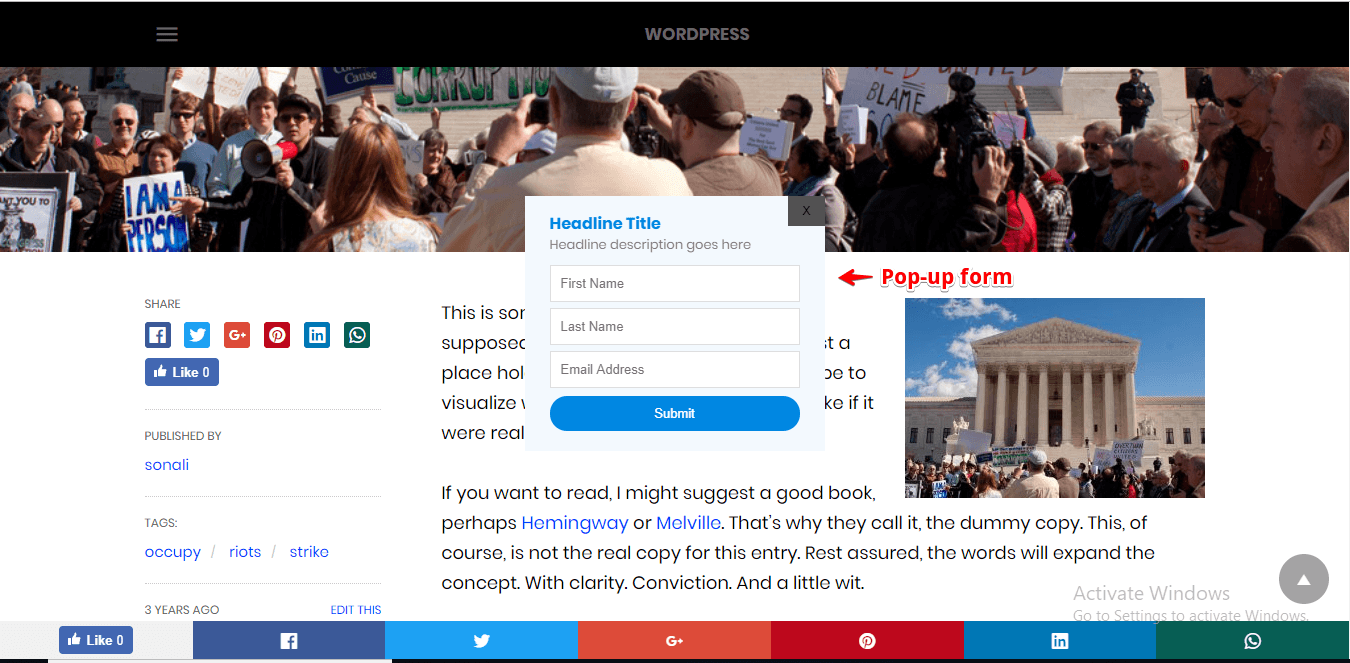
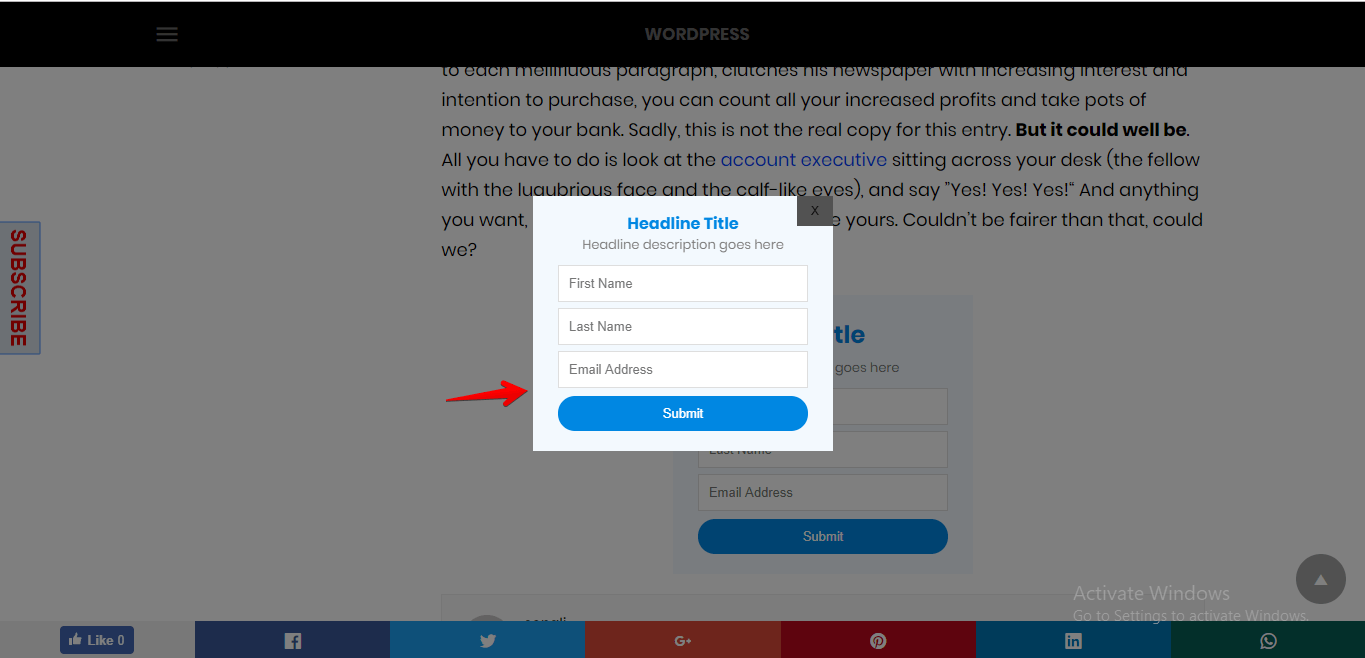
2. POP-UP FORM:

- Pop-up: First you need to enable this option.
- Seconds to delay the Pop-up: In this option, you can enter the delay in the Pop-up. When a user visits the site, It takes some seconds to pop-up the form( eg: 5s ).
- Show on Every Reload: Everytime user reloads a page, Pop-up will be displayed.
The Output of Pop-up
3. MODAL FORM:

- Modal: First you need to enable this option
- Modal Button Text: In this field, you can enter button text as per you requirement.
- Button Position: By using this option you can set the button position.
- Display after Specific Time: In this field you can set the Time Interval in Hours, only in numerics ( eg: 12 )
- Button Background Color: By using this option you can set Button Background Color
- Button Text Color: By using this option you can set Button text Color
- Close Button: Once you check this option close button will be display on you optin form
- Close Button Text: In this field, you can enter close button text as per you requirement.
The Output of Modal Form
That’s it for this tutorial!
We hope it helped you. If you have any feedback or questions, then please share them in the comments section below.
Pingback: How to create Sendy form in AMP – AMP Tutorials
Pingback: How to create a AWeber form in AMP – AMP Tutorials
Pingback: How to create Active Campaign form in AMP – AMP Tutorials
How can I add a reCAPTCHA to the AMP opt-in form?
In your email subscribe form addon, is there an option to do a redirect to a success page instead of getting a subscribe successful message?
Hi Cheryl,
Yes there will be an option redirect where you can place the redirect URL option like below the screenshot -> https://prnt.sc/pe64qo
Is there a way to manually include the opt-in form on a single page in the AMP Page Builder? I’m looking to use the Hubspot integration to replace normal Hubspot forms that don’t work properly in AMP.
Thanks!
Hi Thomas L,
Yes you can use amp opt-in form using amp page builder and there will be module opt-in in amp page builder and please let us know if there’s anything else we can do.
I was a bit disappointed with amp opt-in by the limited lay-out and design functionality. I could not find any option to change the color and type with CSS. I would like this to match the other opt-in forms on the site.
Also, for me this opt-in only worked on amp pages and not regular pages. Is this the current functionality or did I not implement the form correctly
Thanks!
Hi John Penney,
Will you please contact our technical team from here- https://ampforwp.com/support/ they will help you as soon as possible.
How to open the popup on click?
Hi Habib,
Will you please contact our technical team from here- https://ampforwp.com/support/ they will help you as soon as possible.
Hi there,
I just purchased your product and trying to implement it, but my designed colour is not working.
can you help me, please?
also, the modal form is broken. I’m trying to use it for active campaign.
Hi Farshad,
Will you please contact our technical team from here- https://ampforwp.com/support/ they will help you as soon as possible.