
In this tutorial, we’re going to give you step-by-step instructions on how to set up options of Call To Action. We will cover how to:
If you want to add Call To Action in AMP then first you need to purchase and install Call To Action plugin.

In the AMP CTA Extension, there are two types of CTA buttons you can Add.
1. CTA Box
You can see AMP CTA Box in your WordPress Dashboard Create New CTA Box.

Click on Add New CTA Box

- Here CTA TITLE represents the title of your Call To Action button. It can be anything of your choice.
- CTA Description is what you want to tell users. It can also be anything of your choice.
- Button Title will be the Text which you want to show on Call To Action Button. Some examples of Button Titles are, ‘Learn More’, ‘Read More’, ‘Buy Now’, ‘Subscribe’ and can be anything of your choice.
- URL is the destination where you want to take your visitors. It may be a product page, a landing page, a subscription page or other.
- AMP CTA Comes with Shortcode, with which you can use the same Call To Action Box where ever you want
- When you are finally done with designing Call To Action Box, you can Publish it and start using.
The Output of the CTA Box in AMP

1.1: How to Set the position of CTA Box
You will find this option in WordPress Dashboard -> Navigate to AMP option panel -> AMP CTA

- If you want to show CTA Box in Content, First of All, Turn ON ” Automatically Show CTA Box in Content “
- Select a CTA to display from the Drop Down.
- Turning ON CTA Above Content, Make your CTA BOX Appear above the Content.
- Turning ON Between the 50% Content, Make your CTA BOX Appear Between half of your content.
- Turning ON CTA Below Content, Make your CTA BOX Appear Below the Content.
1.2: Styling your CTA Box
You can change the Colors and Appearance of CTA Box. If you want to style your Call To Action, you can follow the below steps.
You will find this option in WordPress Dashboard -> Navigate to AMP option panel -> AMP CTA -> BOX
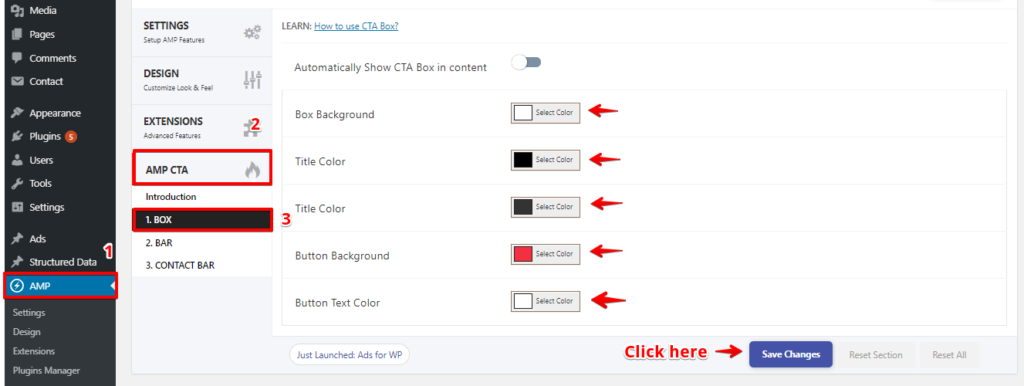
- Box Background: In this field, you can change the Box background color of the CTA BOX.
- Title Color: In this field, you can change the text color of the CTA BOX
- Button Background: In this field, you can change the Button background of the CTA BOX.
- Button Text Color: In this field, you can change the Button text color of the CTA BOX.
2. CTA Bar:
Call To Action bar is similar to the Notification bar, which can be displayed all over the website.
To create custom Call To Action Bar, you follow the below steps.
Go to WordPress dashboard -> AMP CTA -> CTA Bars.

2.1: AMP CTA Bar Settings
- CTA Bar Content: First of All, enable CTA Bar Content.
- CTA Bar Description: Here you can enter the description of the CTA Bar.

- Bar Location: In this option, you will select the bar location here we have two option bottom or top.

- Primary Button: Enable this option to show the primary button.
- Button text: In this field, you can enter the button text.
- Button URL: In this Field, you can enter your Destination URL where you want to take your visitors.
- Secondary Button: This option is similar to the primary button.

- Close Button: Enable this option to close button.
- Close Button Type: Here are two option X and custom text as per requirement you can select any of these.
2.2: Color Schema:
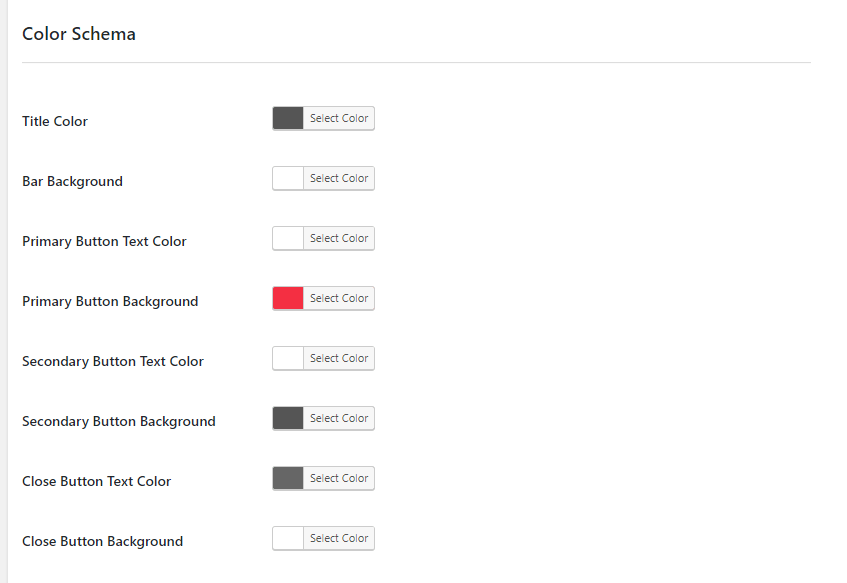
- Title Color: Using this option you can choose the title color for CTA bar.
- Bar Background: Using this option you can choose the background color for CTA bar.
- Primary Button Text Color: Using this option you can choose the Primary Button text color for CTA bar.
- Primary Button Background: Using this option you can choose the Primary Button Background color for CTA bar.
- Secondary Button Text Color: Using this option you can choose the Secondary Button text color for CTA bar.
- Secondary Button Background: In this option, you will choose the Secondary Button background color for the CTA bar.
- Close Button Text Color: In this option, you will choose the Close Button Text Color for the CTA bar.
- Close Button Background: In this option, you will choose the Close Button Background color for the CTA bar.
2.3: Display Condition.
Here you can set the display condition to display CTA bar
As per the below condition, the CTA bar will be only will be shown on the post similar you can set the display condition as per your requirement.

2.4: CTA Bar Status.
CTA bar status, there are two option Active and inactive.
- Active: If you want to make bar status visible then select this option.
- InActive: If you want to make bar status hide then select this option.

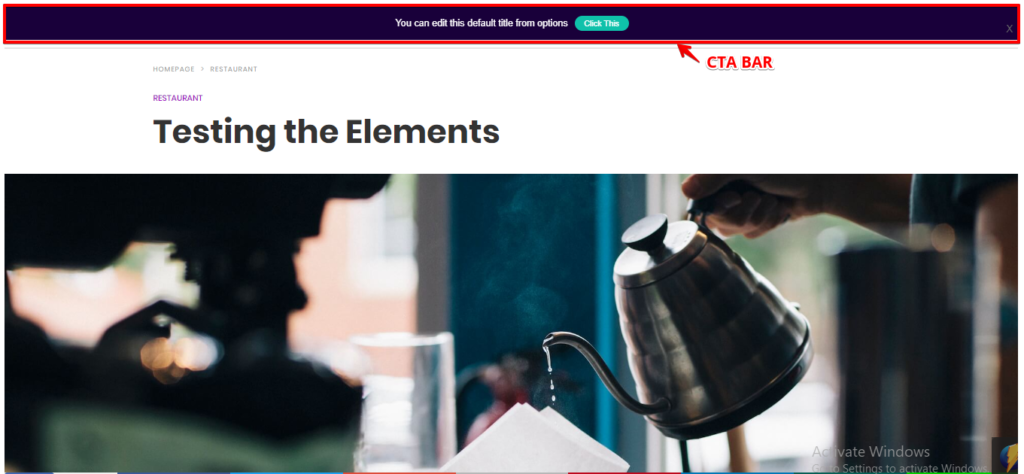
The Output of the CTA BAR
3. Contact Bar:
You will find this option in the WordPress Dashboard -> Navigate to AMP option panel -> Contact Bar.

3.1: CTA Contact Bar.
- Contact Bar: If you enable this option CTA contact bar will be displayed on AMP site.
- Call: IF you enable this option contact icon will be displayed on your AMP version.
- Enter Phone Number: In this field, you can enter the phone number.
- Email: If you want to display an email icon in CTA contact bar then enable this option.
- Skype: If you want to display a Skype icon in CTA contact bar then enable this option.
- WhatsApp: If you want to display a WhatsApp icon in CTA contact bar then enable this option.
3.2: Color Scheme.
- Contact Bar background: In this option, you will choose the background color for the Contact Bar.
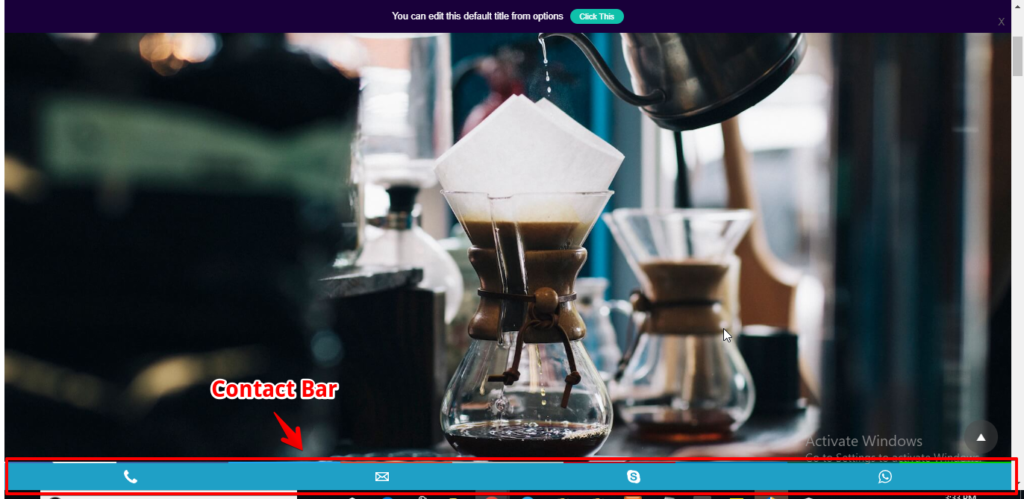
The Output of the CTA Contact Bar:
That’s it for this tutorial!
We hope it helped you. If you have any feedback or questions, then please share them in the comments section below.