
Once you install and activate our AMPforWP plugin then we will have these two options
1. Basic Setup View
- If you are using Basic Setup View then you need to choose Advertisement settings and click on View Setup link like below the screenshot.

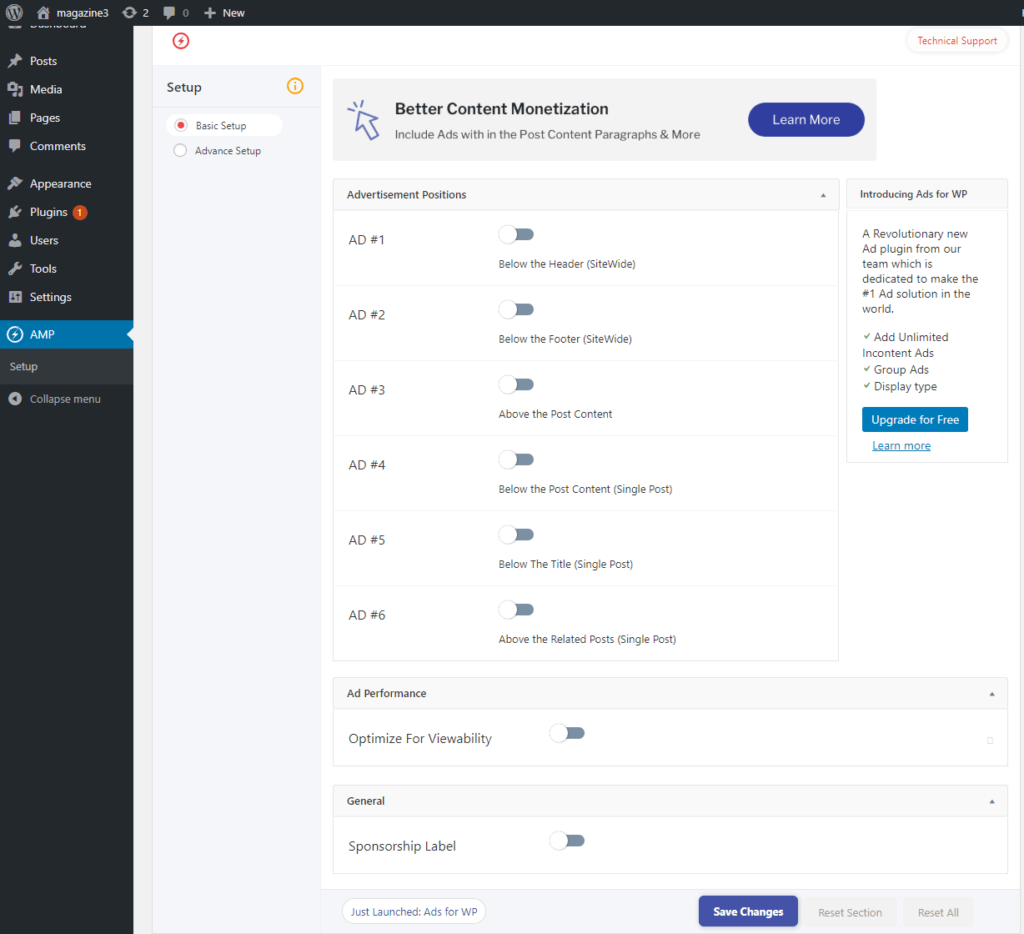
In the Advertisement section, we provide users to place Ads in 6 possible places.
2. Advance Setup View
If you are using Advance Setup View then you need to follow the below steps.
How to set up an Advertisement in AMP?
- In Our Core Plugin, we are providing six slots of Ads but if you want more slots then you need to install our Ads for WP plugin for this you need to click on the “Upgrade for Free” button.
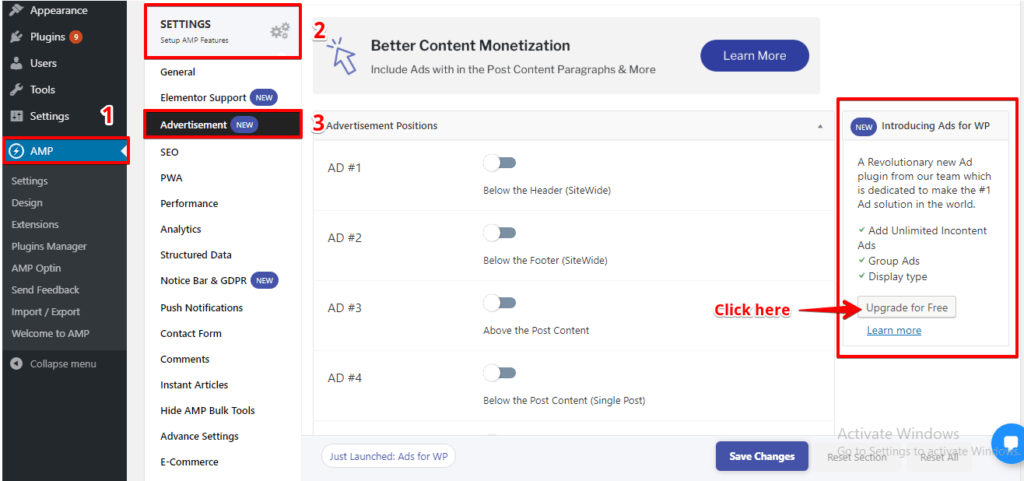
- Once you click on the “Upgrade for free” button the Ads for WP plugin will be installed on your website.
Follow the simple steps if you don’t want to install AdsforWP plugin and if you want to use only 6 Ads shots in our AMP option panel
Step 1: You will find this option in the WordPress admin area ->AMP option panel -> Settings -> Advertisement.
In the Advertisement section, we provide users to place Ads in 6 possible places. These are free Ads options you can display your ads in 6 places.

Step 2: Where you want to display the Ads you can select that particular option.
- Below the Header: Advertisement is shown below the header(sitewide).
- Below the Footer: Advertisement is shown below the Footer(sitewide).
- Above the Post Content: Advertisement is shown above the Post Content.
- Below the Post Content: Advertisement is shown below the Post Content (single post).
- Below the Title (Single Post): Advertisement is shown below the title Content (single post).
- Above the Related Post (Single Post): Advertisement is shown above the Related Post Content (single post).
Step 3: In order to place Ad in those sections, simply Turn ON them.
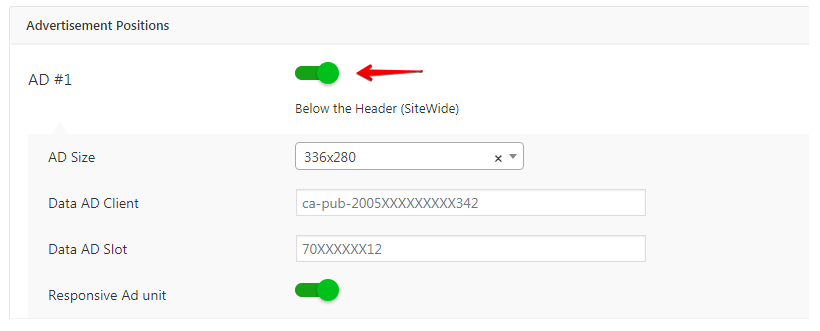
When you Turn on Ad #1, it will ask you to provide the AD Size, Data AD Client, Data AD Slot.
- AD Size: It can be anything depending on your choice.
- Data AD Client: It is nothing but your Adsense Publisher ID
- Data AD Slot: It is a unique Advertisement which can be found in the Adsense Ad Code.
- Responsive Ad Unite: Once you enable this option Ad will be shown into responsive.
Step 4: Click on save changes button and your selected Advertisement position will be displayed on your AMP pages.
We have two new options, Ads for WP & Advanced amp ads
In addition to these 6 ads slots, you can add more ads by using either our free AdsforWP plugin or our Advance AMP Ads plugin.
For more details of AdsforWP plugin check out this tutorial
For more details of Advanced AMP Ads plugin check out this tutorial
That’s it for this tutorial!
We hope it helped you. If you have any feedback or questions, then please share them in the comments section below.
Thanks My website is Find Tricks you can check , i have set add using your post but no ad format option available. what can i do if i want to set a link add ( Google Adsense)
Hi Find Trcks,
Will you please contact our technical team from here- https://ampforwp.com/support/ they will help you as soon as possible.
The Advertisement is not working. It’s showing a blank screen. The option is also not available in the Settings tab.
Hi Narag Gupta,
Will you please contact our technical team from here- https://ampforwp.com/support/ they will help you as soon as possible.