
In this tutorial, we’re going to give you step-by-step instructions on how to set up options of Contact Form 7. We will cover how to:
Here are few simple steps:
The first thing you need to do is go to your WordPress admin area and click on AMP option panel -> AMP CF7.
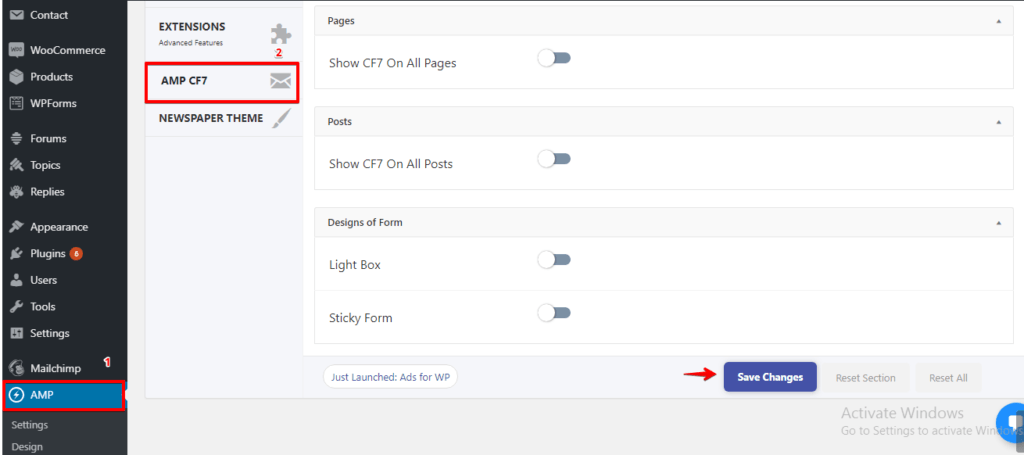
1.Pages
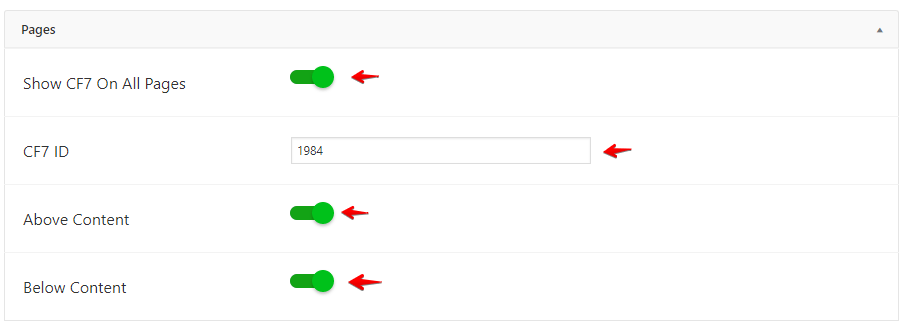
Show CF7 On All Pages: First, enable this option it will be showing Contact Form 7 in all pages.
CF7 ID: In this field, you need to enter the CF7 ID which you want to show in all amp pages/posts .
From here you can get the CF7 ID

Above Content: If you enable this option Contact form 7 will be shown above the content.
Below Content: If you enable this option Contact form 7 will be shown below the content.
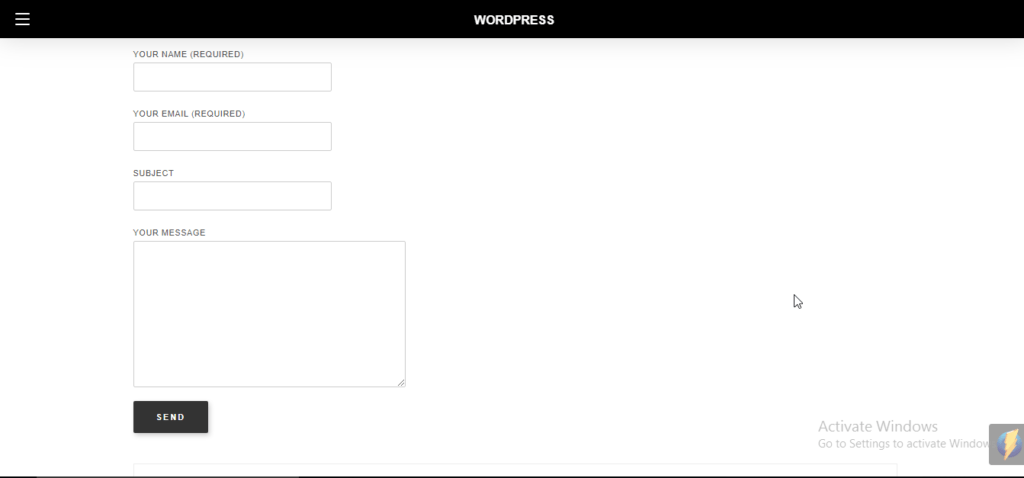
The output of the CF7 in AMP site:
2. Posts

It is similar like pages once you enable this option it will be showing Contact Form 7 in all post.
Light Box: Once you enable this option Light box will be shown on AMP site.
3. Light Box

Contact Form ID: In this field, you need to enter the CF7 ID which you want to show in all AMP site.
From here you can get the CF7 ID

Form Title: Once you enable this option title will be display on AMP site.
Seconds to delay the Pop-up: You can place the delay time for popup as per your requirement in the text box.

Form Background: You can choose the color for the form background.
Label: You can choose the color for the label.
Submit Button: You can choose the color for the submit button.
Submit Button Label: You can choose the color for submit button label.
The output of the Light box in AMP site:

4. Sticky Form
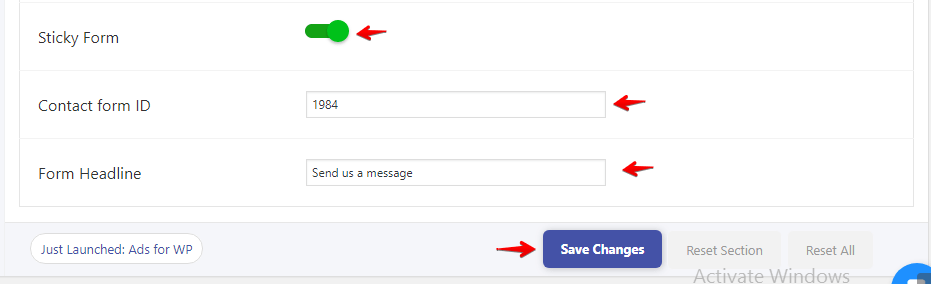
Sticky Form: Once you enable this option sticky form will be display on AMP site.
Contact Form ID: In this field, you need to enter the CF7 ID which you want to show in all AMP site.
From here you can get the CF7 ID

Form Headline: Once you enable this option form headline will be display on AMP site.
The output of the Sticky Form in AMP site:

That’s it for this tutorial!
We hope it helped you. If you have any feedback or questions, then please share them in the comments section below.
This plugin don’t working, dont buy, the redirect after submit doesn’t work.
Hi Jose,
Could you please tell me which redirection plugin you are using for redirecting the contact form.
HI i noticed that when a field is no valid no error message appears
Hi dave,
Will you please update the latest version of CF7 and still if you are facing issue/problem then contact our technical team – https://ampforwp.com/support/ they will help you as soon as possible
The plugin does not work. I have 2 CF7 forms in the AMP version and they don’t show up. Also, the page builder has stopped working.
Hi Alfonso,
Will you please contact our technical team from here- https://ampforwp.com/support/ they will help you as soon as possible.