Today’s world is significantly identified with two things: smartphones and internet. Both of them are so intrinsic to each other than talking about one thing in isolation is almost impossible. Any information from anywhere around the world can be accessed with the help of smartphones. Such an easy access have increased the pressure on content creators to ensure availability, accessibility, relevance, and quality of the content. In the process, the emphasis is laid on user engagement and conversion.
In this article, we walk you through the entire guidelines and the process of tracking content metadata and user interaction on mobile web pages with Google analytics for AMP pages. In order to get a basic understanding of AMP tracking in Google analytics refers to ‘Adding Analytics to Your AMP Pages’ in GA help pages.
There are four different ways through which user can enter AMP pages and the associated tracking problem one generally faces. These are:
- Google search
- Proxy Cache
- Direct AMP
- Non-AMP
Google search:
It is one of the most common approaches. In this process, the AMP viewer accesses the page through organic search. The problem encountered in such a scenario is that as you load the page to resolve to google.com; the analytics tracking script is not triggered. Resultantly a new session is created especially when the user clicks through the AMP or non-AMP content hosted on your website. Consequently one ends up with replicated data of two sessions, two users instead of one, thus it will result in the increase in bounce rate.
Proxy cache:
The possibility of proxy cache is rare. In this process, the users may access your content through proxy cache on cdn.ampproject.org, in which a completely unique client ID would be created. So similar problem can emerge here although it’s rare and almost impossible that someone will actually be able to have that exact URL. Because it is not possible to get the URL without a deep dig which is difficult.
Direct AMP:
Here the AMP is directly published on the publisher domain. As the user access the AMP an AMP client ID is generated, which will be used across AMP and Non-AMP pages. This occurs mostly when people have saved your page as a bookmark, or are sharing it with a friend and are getting to your AMP page directly. This does not occur through organic search.
Non AMP: When the user visits a publisher’s domain directly, a normal client ID is generated, that is used across AMP or Non-AMP pages.
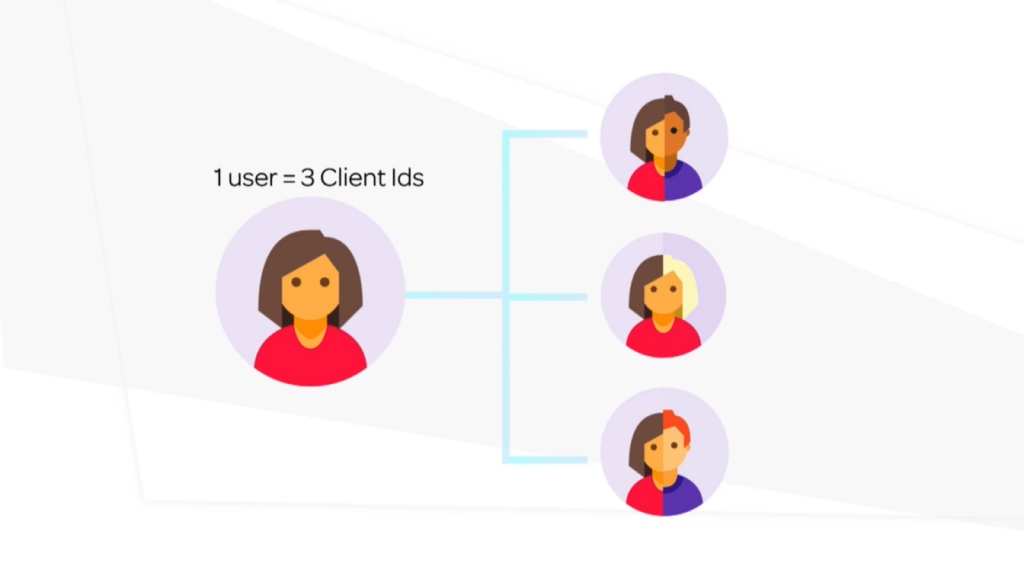
As we have seen in all the four scenarios mentioned a client ID to each user is generated; which has thereof resulted in data shoot up primarily because of replication of data. This becomes a huge problem especially when conversion rates mechanism based on sessions versus clicks is used. Because in the scenarios mentioned above the sessions have been duplicated and data of the same has shot up while the number of clicks are relatively less. Here it might seem that the AMP is not a beneficial mechanism, however, the issue here is with an incorrect placing of analytics. In this article, we explain the solution to such problems which is using AMP client ID API.
Enabling AMP Client ID API to consolidate sessions across AMP and Non-AMP
Google’s AMP Client ID API lets you uniquely identify users who engage with your content on AMP and non-AMP pages. If you opt-in, Google Analytics uses the AMP Client ID to determine that multiple site events belong to the same user when those users visit AMP pages via a Google AMP Viewer. Associating events and users provides features like user counts and session-based metrics.
To enable AMP Client ID on AMP pages, add the following code to the header of all AMP pages. Walkthrough the below steps to add the code:
<meta name= "amp-google-client-id-api" Content= "googleanalytics">
Goto AMPforWP settings –> Advanced Settings –> Paste the code
To enable AMP Client ID on AMP pages, add the following code to the header of all Non-AMP pages.
ga('create', 'UA-XXXXX-Y', 'auto' {'useAmpclientId:true});
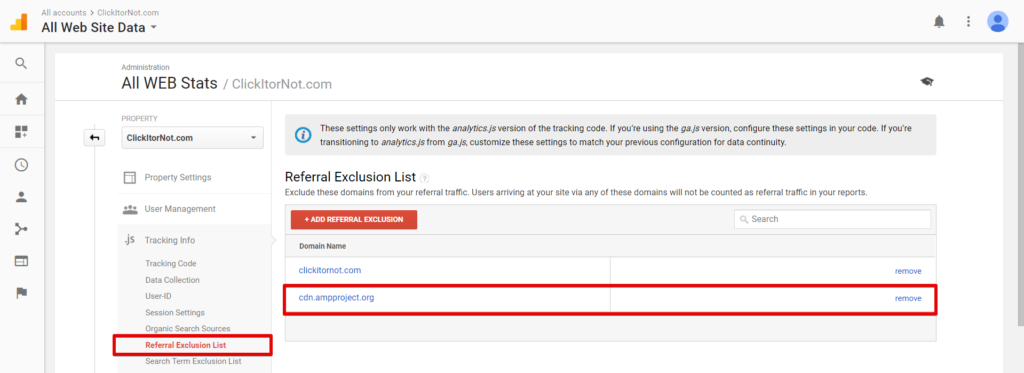
And Finally, add cdn.ampproject.org in Google Analytics Execution list.

Track Events with dynamic values on AMP Pages
Adding an event in AMP Analytics requires using a trigger, sending a request with a type event by defining a selector, and adding at minimum values for the required event category.
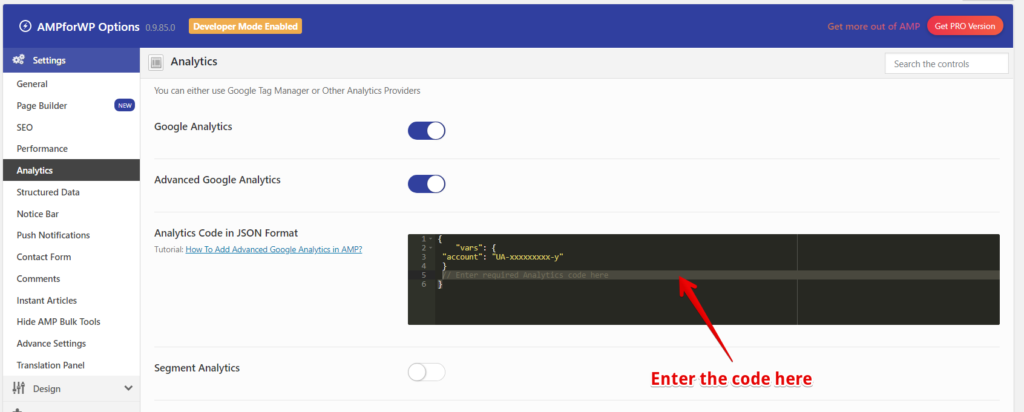
Add the required code after the following in Advanced Google Analytics in AMPforWP settings
{
"vars": {
  "account": "UA-XXXXX-Y"
}
// Enter required Analytics code here
}
Tracking the Button Clicks
"trackClickOnAllBtn" :{
"on": "click",
"selector": "click-track",
"request": "event",
"vars": {
"eventCategory": "button-clicks",
"eventAction": "$(eventId)",
"eventLabel": "Brand11"
}
Tracking Pageviews
"triggers": {
    "trackPageviewWithCustomUrl": {
      "on": "visible",
      "request": "pageview",
      "vars": {
        "title": "My page",
        "documentLocation": "https://www.examplepetstore.com/pets.html"
      }
    }
  }
You can insert title, URL, and id as {title}, {url} and {id} respectively. (Only in AMPforWP) For example:
"url": "{url}",
"title": "{title}",
"id": "{id}"
Tracking Social interactions
"triggers": {
    "trackClickOnTwitterLink" : {
      "on": "click",
      "selector": "#tweet-link",
      "request": "social",
      "vars": {
         "socialNetwork": "twitter",
         "socialAction": "tweet",
         "socialTarget": "https://www.examplemedia.com"
      }
    }
  }
Track Scrolling
"triggers": {
 "scrollPings": {
 "on": "scroll",
 "scrollSpec": {
 "verticalBoundaries": [10, 20, 30, 40, 50, 60, 70, 80, 90]
 },
 "request": "event",
 "vars": {
 "eventId": "scroll"
 }
 }
 }
Advanced Tracking – Custom Dimensions
Custom dimensions in Google Analytics is a powerful tool. As standard Analytics code tracks general predefined things, the custom dimensions are to track extra things.
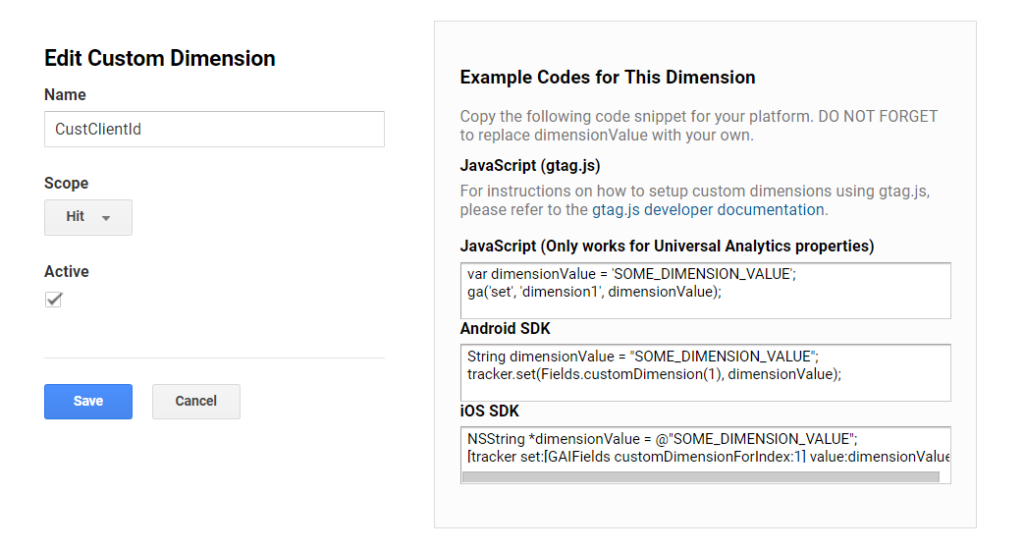
- Create Custom Dimension in Google Analytics Admin Panel
Goto GA Admin settings –> under Property Column select Custom Definitions and in the drop-down click on Custom Dimensions –> Now Add New Custom Dimension
- Add the following Analytics code to all the AMP pages.
"extraUrParms": {
  "cd2" : "${clientId}"
}
Add the following Analytics code to all Non-AMP pages.
ga(function(tracker) {
    tracker.send('pageview, {'dimension1' : tracker.get('clientId') });
});
The client ID which is accessible in all reports enables custom dimensions. It is being passed not only with page view tracking but also with any events that were triggered on our AMP pages. Each one of these IDs generated represents a single user. Hence it becomes easy to classify the data using client ID by page, dimension, dynamic values that one passes. You can also break down the data to one to one interaction whether the user came in from Google or directly or any of the methods. Therefore, by outlining and tracking key performance indicators the problems generally encountered are solved. The solution techniques used are client ID API, custom event tracking, or dimension pushing.
As the client ID API is implemented and is pushed you will be able to see whether a user first interacted with an AMP or non-AMP page. For a user first accessing the content through an AMP page, a client ID starting with AMP is generated while the user who accesses the content from a non-AMP page is given a different ID. Because of such a process, it becomes too easy to analyze the behavior of the users first accessing AMP page or non-AMP page. This is, however, still being worked on.
Hope you have successfully implemented Advanced Analytics in AMP and Non-AMP pages. If you have any doubts from this article, let us know in the comment section below.


more related posts