Step 1: From the dashboard, we go to the left-hand side in the Menu bar go to Plugin.
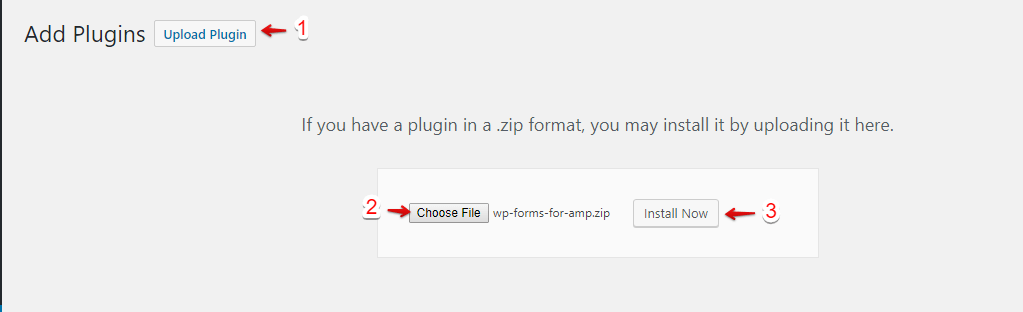
Step 2: Go to the plugin -> Add new. At the top, right next to the work Add New is a button Upload Plugin. Click that button, and a new area of the page should become visible to you.
Step 3: In this, you can drag-and-drop or use the Choose File button to use your system’s file browser to find the ZIP file.
Step 4: Click on the install now button.
Step 5: Once installed, you need to click on the Activate Plugin link.
4. Done! The AMP Cache will be visible on the AMP version of your site like below the screenshot.
That’s it for this tutorial!
We hope it helped you. If you have any feedback or questions, then please share them in the comments section below.
If you want to add an AWeber form in AMP then first you need to…
Webpushr is the fastest growing web push notifications platform that marketers love & developers rely…
Follow these steps to add Adobe Analytics in AMP Step 1: Go to WordPress Admin Area -> AMP…
Core Web Vitals are the subset of Web Vitals that apply to all web pages,…
The following reasons can be shown for non-indexing. Server error (5xx) Your server returned a 500-level…
We have added the Google Analytics 4 ( GA 4 ) integration in AMPforWP v1.0.80.…