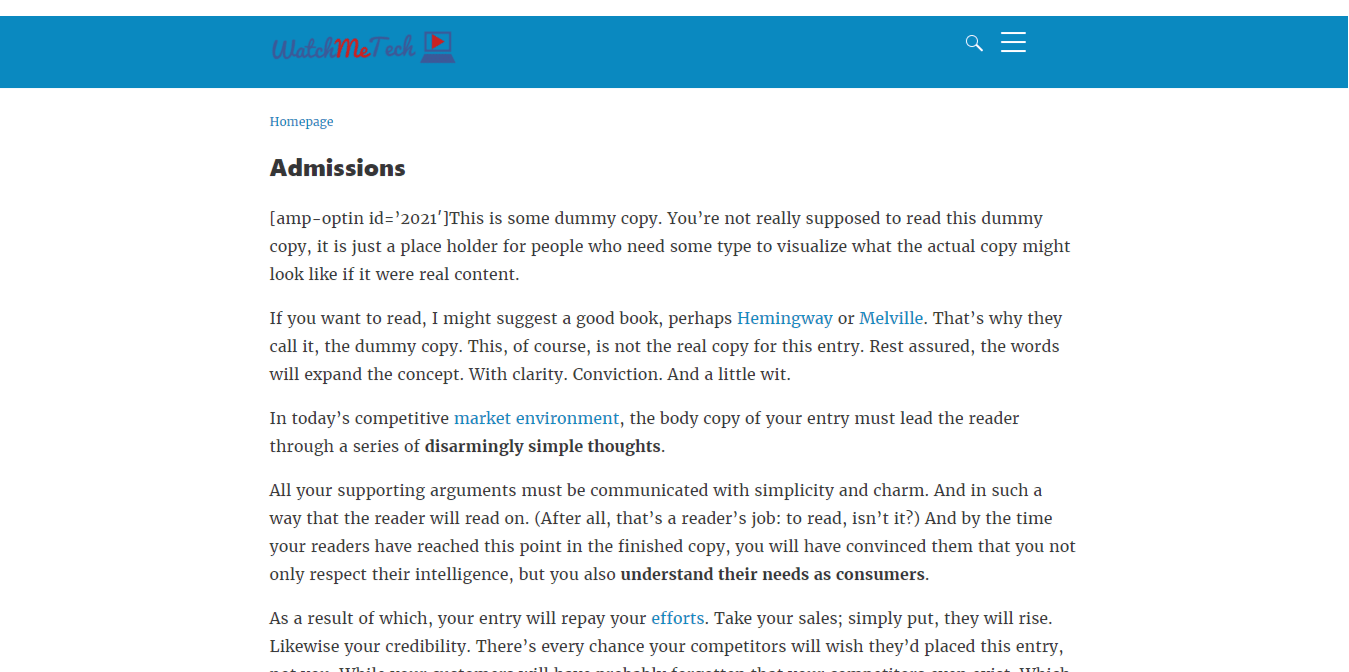
You can create menus in WordPress by visiting Appearance -> Menus in your WordPress admin area.
3. Click on create a new menu.
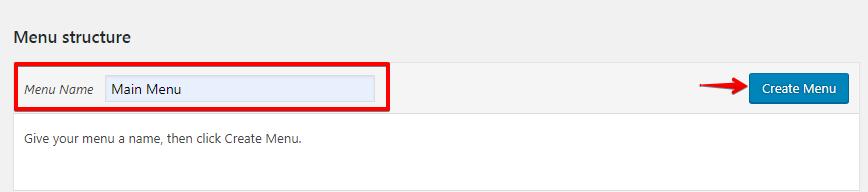
4. Provide a name for your menu in the Menu Name field and then click the Create Menu button.
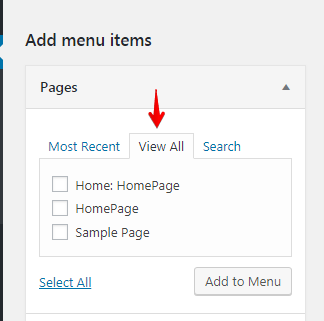
6. Next, you need to click Pages and View All. You can select the boxes for the pages that you want in your menu and click on add to menu button.
7: Go to Appearance-> Menus and create a new menu say AMP menu.
Now add the things which you want to shown in AMP menu.
There are three checkbox in AMP where you can add navigation menu.One is the Header and other is Footer area.
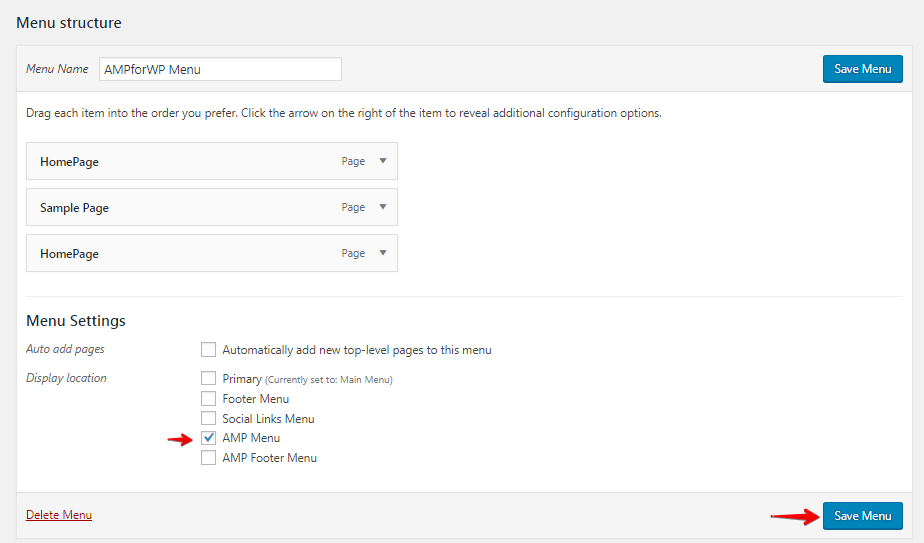
If you want to add navigation menu in Header then select AMP menu checkbox for that particular menu and click on save menu button.
If you want to add navigation menu in Footer then select AMP Footer Menu checkbox for that particular menu and click on save menu button.
Note: You can add Menu in both Header and footer at the same time as well.
If you want to add AMP Alternative Menu in Below the Header then select AMP Alternative Menu – Below the Header checkbox for that particular menu and click on save menu button.
Follow these simple steps.
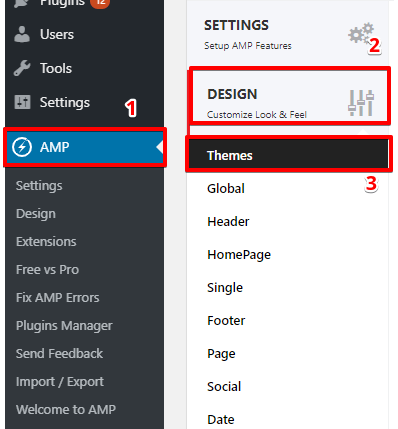
1. From the dashboard, we go to the left-hand side in Menu bar go to AMP option panel -> Click on Design Option -> Themes as shown in the below screenshot.
2. Got to Design option -> Themes -> Themes Selector option. When you click on Themes Selector option list will be shown . select the Swift theme.
3. Ones you select swift theme, this theme related option is shown in Header. Go to AMP option panel -> Design -> Header.
Header Design :
There are Three type of Header Design .which type of header design want you can select Header Type.
Go to AMP option panel -> Design -> Header ->Header Design
Navigation Menu Design :
This is the default menu type in Navigation Menu Design.
1. Go to AMP option panel -> Design -> Header ->Header Design
Menu Search:
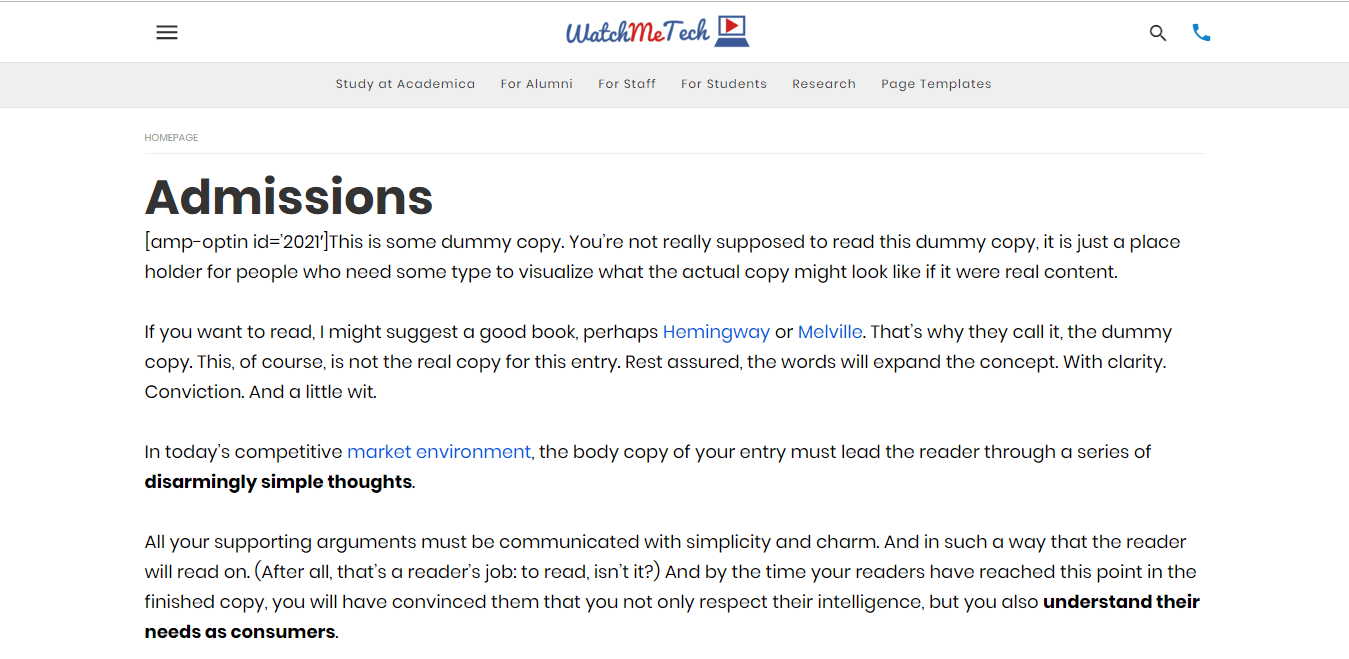
Ones you enable Menu Search option search option will be shown on website
Menu Copyright:
If you enable Menu Copyright option it will be shown on website.
Go to AMP option panel -> Design -> Header ->Header Design -> Header Type
User can select Header Type 2 in this type additional Button Customize option will be show
Output will be display like this:
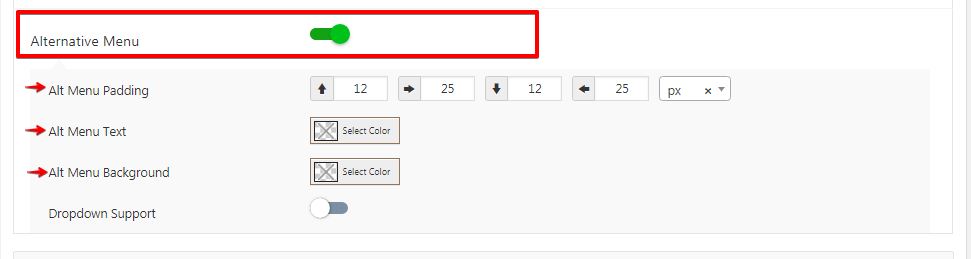
Alternative Menu:
Ones you enable Alternative Menu option menu it will be shown on website.
Output of Alternative Menu option
Dropdown Support : when you enable this option it will Create a dropdown menu that appears when the user moves the mouse over an element inside a navigation bar.
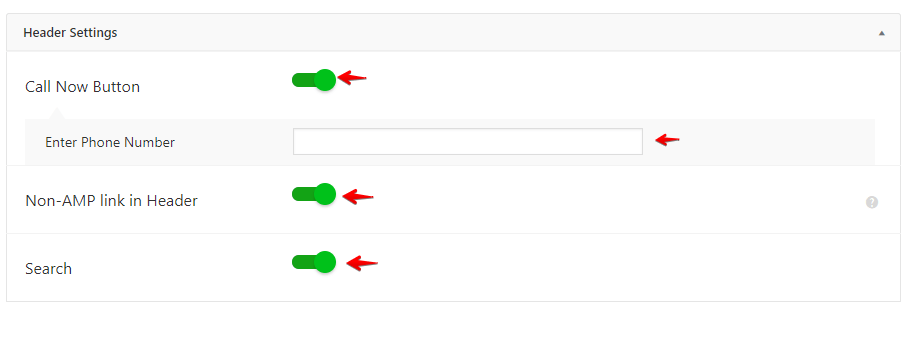
Header Settings:
Call Now Button : user enable this option enter phone number field will be show, ones you enter the phone number in this filed this phone functionality will be display on header.
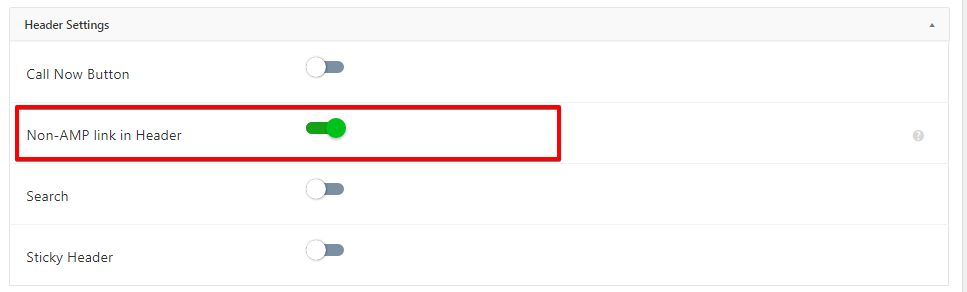
Non-AMP link in Header : Ones you enable this option when you click on text or logo non amp link will be show
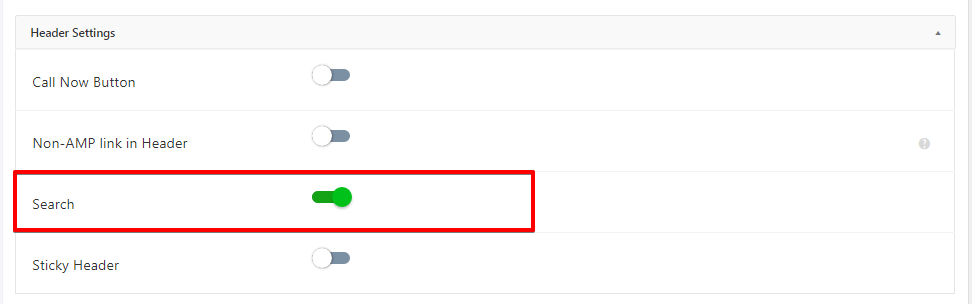
Search : when you enable search option this search functionality will be show in header.
Sticky Header: The sticky header will fix the header in the top portion of your web page when a user scrolls the page. It will allow quick access to the menu from any part of the page.
Advanced Header Options :
If you want advance header design below the option are use. By using this option you can change the header width , header height and menu color etc. ones you done all setting click on save change button.
1. First go to WordPress Admin Area -> AMP option panel -> Design -> Themes
2. Go to Design option -> Themes -> Themes Selector option. When you click on Themes Selector option list will be shown . select the Design Three theme.
3. Ones you select Design Three theme, this theme related option is shown in Header. Go to AMP option panel -> Design -> Header.
Navigation Menu Design :
Navigation Menu: Once you enable this option in the header menu will be created in the left side.
Header Settings:
Call Now Button: Once you enable this option call icon will be created in the Header section.
Non-AMP link in Header: Once you click on the header in the logo it will redirect to Non-AMP page.
Make Header UnSticky: Turning it ON will remove the sticky head from the design.
Search: If you enable this option search option will be displayed in the header section.
Header Background: In this option, you can select the background color for Header in design three.
Header Elements: In this option, you can select the text color for Header in design three.
1. First go to WordPress Admin Area -> AMP option panel -> Design -> Themes
2. Go to Design option -> Themes -> Themes Selector option. When you click on Themes Selector option list will be shown . select the Design Two theme.
3. Ones you select Design Two theme, this theme related option is shown in Header. Go to AMP option panel -> Design -> Header.
Navigation Menu Design :
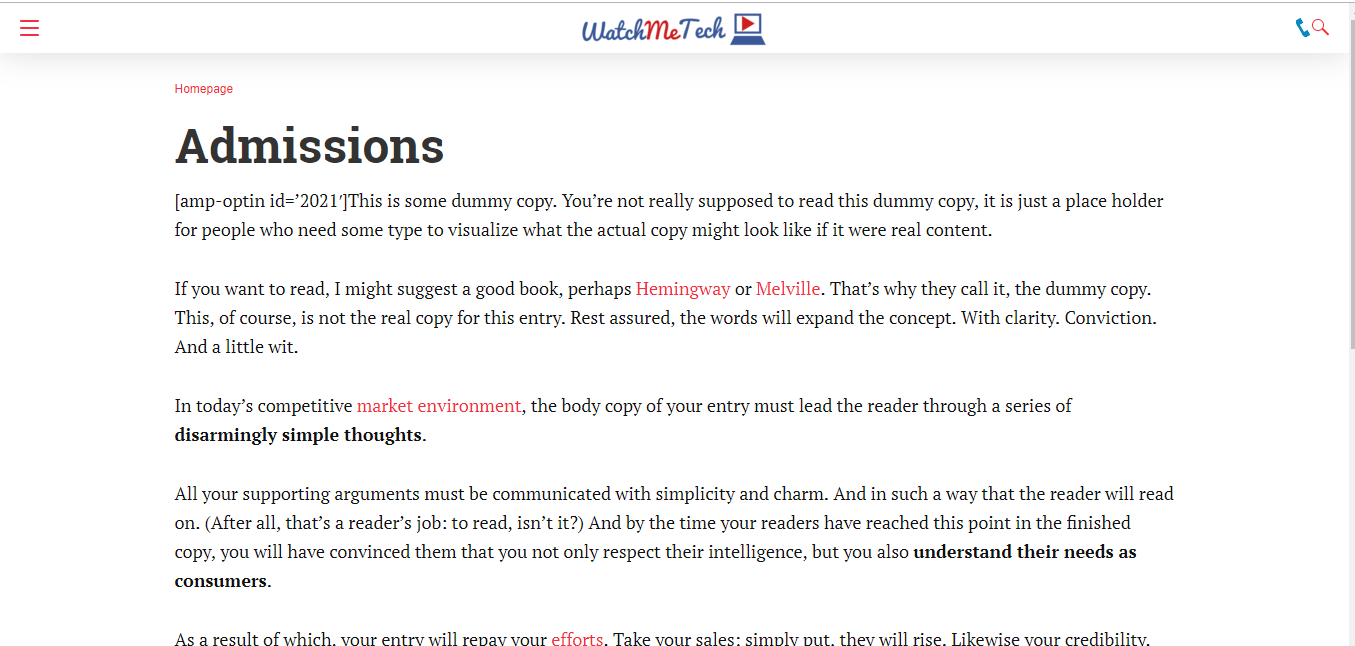
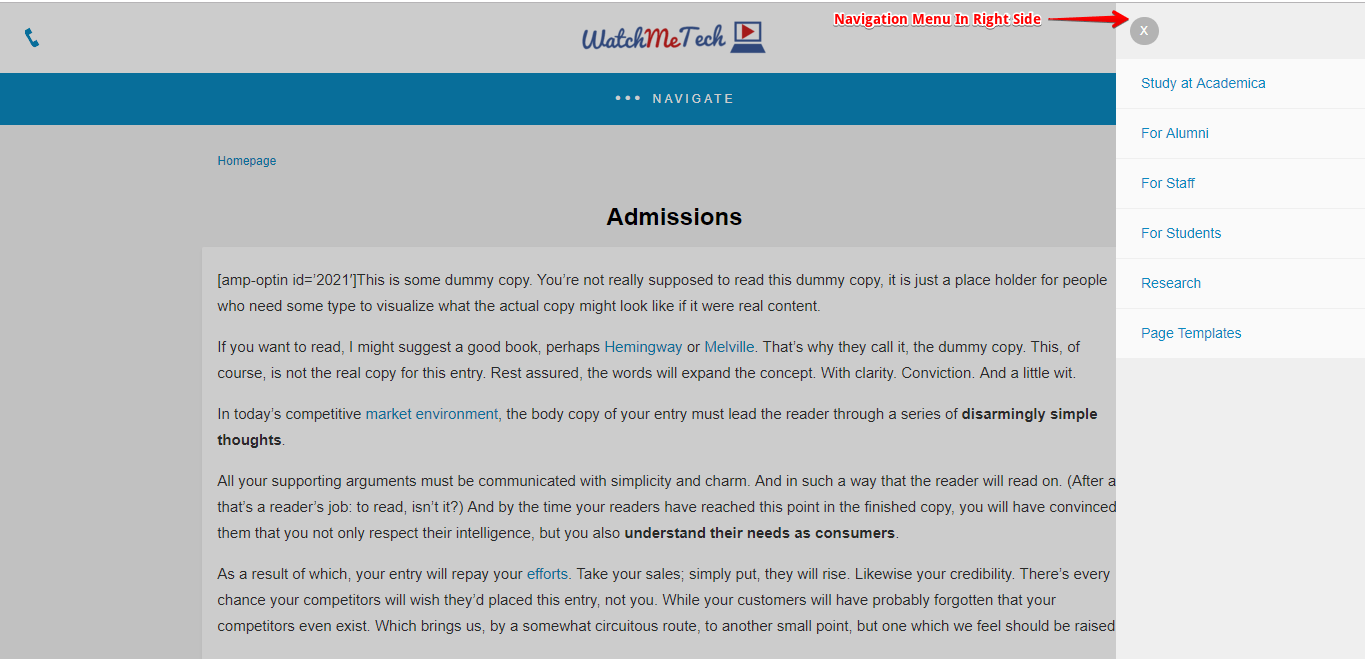
Navigation Menu: Once you enable this option in the header menu will be created on the right side.
Header Settings:
Call Now Button: Once you enable this option call icon will be created in the Header section.
Non-AMP link in Header: Once you click on the header in the logo it will redirect to Non-AMP page.
Search: If you enable this option search option will be displayed in the header section.
1. First go to WordPress Admin Area -> AMP option panel -> Design -> Themes
2. Go to Design option -> Themes -> Themes Selector option. When you click on Themes Selector option list will be shown . select the Design One theme.
3. Ones you select Design One theme, this theme related option is shown in Header. Go to AMP option panel -> Design -> Header.
Navigation Menu Design :
Navigation Menu: Once you enable this option in the header menu will be created on the right side.
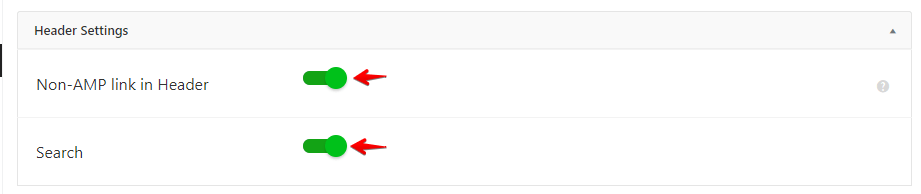
Header Settings:
Non-AMP link in Header: Once you click on the header in the logo it will redirect to Non-AMP page.
Search: If you enable this option search option will be displayed in the header section.
That’s it for this tutorial!
We hope it helped you. If you have any feedback or questions, then please share them in the comments section below.
If you want to add an AWeber form in AMP then first you need to…
Webpushr is the fastest growing web push notifications platform that marketers love & developers rely…
Follow these steps to add Adobe Analytics in AMP Step 1: Go to WordPress Admin Area -> AMP…
Core Web Vitals are the subset of Web Vitals that apply to all web pages,…
The following reasons can be shown for non-indexing. Server error (5xx) Your server returned a 500-level…
We have added the Google Analytics 4 ( GA 4 ) integration in AMPforWP v1.0.80.…